Top 5 Metin2 Dungeons for Europe & Eostre (EU West) Players – Difficulty, Rewards, and Strategies
On the freshly launched Europe and Eostre (EU West) Metin2 servers, dungeons have quickly become one of the most lucrative and competitive activities in the game. They’re not just a steady source of Yang and valuable resources — they also hold exclusive, time-limited items tied to seasonal events. For ambitious players, these instances are a golden opportunity to climb the rankings, secure coveted Server First rewards, and power up their characters at record speed.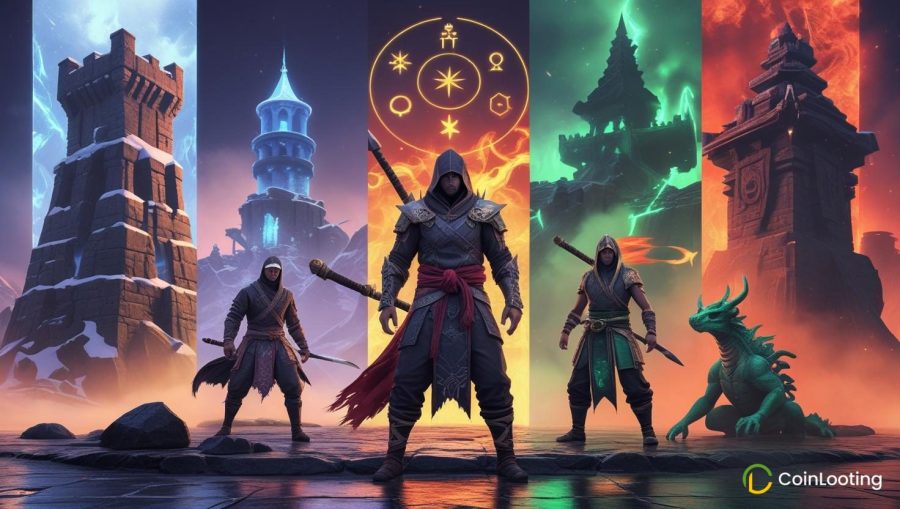 Below is our selection of the top 5 Metin2 dungeons that deliver the highest value, complete with strategies, reward breakdowns, and preparation tips to help you dominate every run.
1. Nemere’s Watchtower
Difficulty: ★★★★★ (High)
Best for: Rare stones, amulets, and high-end gear upgrades
Overview:
Nemere’s Watchtower is one of the toughest PvE challenges in Metin2, consisting of multiple icy floors packed with elite mobs and mini-bosses. Each floor introduces different mechanics, from timed mob clears to puzzle-like switches, and the final boss fight against Nemere demands both strong gear and excellent coordination.
Entry Requirements:
- Level: 90+ recommended for survivability and damage output
- Key Item: Ice Key (crafted from quest items or purchased)
- Cooldown: 24 hours per entry attempt
Rewards:
- Magic Stone (up to 3 for 1st place in Server First) — highly sought-after for endgame upgrades
- Nazar Amulet — essential for PvP and high-level PvE
- Whelp Box — contains valuable loot including Cor Draconis
- High-grade upgrade materials for weapons and armor
- Chance for rare drop accessories and resistance gear
Notable Floors:
- Floor 5: Time-limited mob clear — bring strong AoE to avoid failure.
- Floor 7: Mini-boss with frost debuff — remove or resist it to maintain DPS.
- Floor 9: Requires activating crystals in a specific order while under constant mob pressure.
Final Boss – Nemere:
- Alternates between massive AoE ice storms and targeted freezes.
- Summons adds periodically — ignore them too long and you’ll get overwhelmed.
- Requires constant movement to avoid ground-based damage zones.
Best Classes for the Run:
- Warrior (Body) — tanking and sustained DPS
- Sura (Weaponry) — high burst for mini-bosses
- Ninja (Archery) — safe ranged DPS during AoE phases
- Shaman (Dragon) — critical for buffs and heals
Tips for Success:
- Stock up on Ice Resistance Potions and Shaman buffs before entering.
- Split your team: one group handles mobs, the other pushes mini-bosses to save time.
- Assign a shot-caller to coordinate switches and crystal activation.
- For Europe/Eostre servers, early completions are in high demand for Server First rewards and the Magic Stone market is especially lucrative in the first weeks.
Estimated Run Time:
- 25–40 minutes for a geared, coordinated group
- 50+ minutes for undergeared teams or first attempts
2. Red Dragon Fortress
Difficulty: ★★★★☆ (Challenging)
Best for: Farming Ritual Stones, rare accessories, and high-value upgrade materials
Overview:
The Red Dragon Fortress is one of Metin2’s most iconic high-level dungeons. Located deep within fiery caverns, it pits players against waves of lava-themed mobs and culminates in an intense battle with the Red Dragon itself. This instance is both a consistent gold-maker and a source of unique drops, making it a must-run for competitive players on the Europe and Eostre (EU West) servers.
Entry Requirements:
- Level: 90+ recommended
- Key Item: Red Dragon Fortress Key (obtained via crafting or questline)
- Cooldown: 24 hours between completions
Rewards:
- Ritual Stone — essential for crafting and high-level enhancements
- Nazar Amulet — vital for PvP survivability and damage mitigation
- Whelp Box — with chances for Cor Draconis and rare loot
- Rare weapon upgrade materials with high market value
- Additional drops such as Dragon Scales, Dragon Claws, and Fire Resistance gear
Dungeon Layout & Challenges:
- First Section: Packed with fire-resistant mobs that require strong physical DPS.
- Mid-Section: Lava floors and environmental hazards — constant healing is required.
- Boss Room: Large open arena with multiple mob spawn points.
Final Boss – Red Dragon:
- Heavy Fire AoE attacks that can wipe unprepared teams.
- Summons waves of adds at HP thresholds — failure to clear them quickly can lead to a wipe.
- Has an enrage phase in the final 20% HP, increasing damage output significantly.
Best Classes for the Run:
- Warrior (Body) — frontline tanking and cleaving mobs
- Sura (Weaponry) — strong burst for boss phases
- Ninja (Archery) — safe ranged DPS during high AoE damage
- Shaman (Dragon) — fire resistance buffs and team-wide heals
Tips for Success:
- Equip Fire Resistance gear and consumables to survive the boss’s breath attacks.
- Save high-damage skills for the enrage phase to shorten the dangerous final moments.
- Keep mobile to avoid lava damage zones.
- Clear adds immediately upon spawn to keep the boss fight manageable.
Estimated Run Time:
- 20–35 minutes for experienced, geared groups
- 40+ minutes for first-time or undergeared teams
3. Zodiac Temple (34th Floor)
Difficulty: ★★★★☆ (Mechanics-Heavy)
Best for: Farming large quantities of enhancers, high-value upgrade materials, and rare mounts
Overview:
The Zodiac Temple is one of Metin2’s most unique PvE challenges, with each floor offering a different enemy type, elemental mechanic, or puzzle. Reaching and clearing the 34th floor is considered a significant achievement and offers some of the most profitable loot in the game. On the Europe and Eostre (EU West) servers, this dungeon is also a key race for Server First rewards, making it a hotspot during the early weeks after launch.
Entry Requirements:
- Level: 100+ recommended for survivability and damage output
- Key Item: Zodiac Temple Entry Pass (acquired through quests or event rewards)
- Cooldown: Limited daily attempts — plan runs carefully
Rewards:
- Enchant Item, Reinforce Item, Orison — essential for gear upgrades and enhancements
- Manny (mount, up to 30 days) — a rare and valuable reward
- Additional drops include elemental stones, resistance gear, and rare crafting materials
Dungeon Layout & Challenges:
- Each floor changes mechanics — expect sudden shifts in enemy type and elemental affinity
- Randomized layouts mean that no two runs are exactly the same
- Some floors introduce timed kill requirements or mob waves that must be cleared before progressing
Key Mechanics for the 34th Floor:
- High-level enemies with significant resistance to both physical and magical damage
- Environmental effects like damage-over-time zones or slowing fields
- Occasional mini-bosses that must be defeated to unlock the final floor’s gate
Best Classes for the Run:
- Sura (Weaponry) — versatile damage against both single targets and groups
- Ninja (Archery) — effective against ranged threats and mobile bosses
- Warrior (Body) — reliable frontline with high survivability
- Shaman (Dragon) — crucial for switching buffs depending on the elemental threat
Tips for Success:
- Bring a mix of elemental weapons to counter changing enemy resistances
- Coordinate buff swaps mid-run to adapt to different threats
- Keep track of the time limit — speed is just as important as damage output
- Use crowd-control abilities to manage mob-heavy floors efficiently
Estimated Run Time:
- 30–45 minutes for experienced, well-prepared groups
- Longer for undergeared or uncoordinated teams due to the floor variety
4. Beran-Setaou (Blue Dragon)
Difficulty: ★★★☆☆ (Moderate)
Best for: Rare mounts, valuable accessories, and steady Yang income
Overview:
The Blue Dragon’s Lair is a mid-to-high level dungeon that remains popular due to its consistent rewards and relatively accessible mechanics. The final boss, Beran-Setaou, is a massive ice dragon with devastating AoE attacks and unique aerial phases. On the Europe and Eostre (EU West) servers, this dungeon offers a reliable way to earn rare items and valuable Yang, even for groups that are not fully endgame geared.
Entry Requirements:
- Level: 90+ recommended
- Key Item: Ice Dragon’s Key (crafted or obtained from event drops)
- Cooldown: 24 hours per attemp
Rewards:
- Gryph (mount, up to 60 days) — prestigious and highly sought after
- Ring of Joy — boosts various combat stats and is in high demand
- Cor Draconis (Antique) — essential for refining and crafting high-grade items
- Additional loot includes Ice Resistance gear, upgrade materials, and consumables
Dungeon Layout & Challenges:
- Narrow, icy paths with elite mobs that deal frost damage
- Several mini-bosses that guard the path to Beran-Setaou
- Environmental hazards like slippery terrain and frostbite debuffs
Final Boss – Beran-Setaou:
- Ice Breath AoE: Deals massive damage and applies a slow debuff
- Summon Phase: Calls frost-element adds that swarm the group
- Aerial Phase: Takes flight and bombards the area with ice shards — requires ranged DPS focus
Best Classes for the Run:
- Warrior (Body) — tanking and melee DPS
- Sura (Weaponry) — strong single-target damage for boss burn phases
- Ninja (Archery) — critical during the aerial phase
- Shaman (Dragon) — buffs for Ice Resistance and sustained healing
Tips for Success:
- Equip Ice Resistance gear and use consumables to mitigate frost damage
- Keep the party close to ensure effective healing during AoE attacks
- Time your ranged burst during the dragon’s flight phase to shorten the encounter
- Clear adds immediately to prevent them from overwhelming the healer
Estimated Run Time:
- 15–25 minutes for experienced teams
- 30+ minutes for newer or undergeared groups
5. Serpent Temple
Difficulty: ★★★★☆ (Challenging)
Best for: Rare accessories, aura upgrades, and valuable crafting materials
Overview:
The Serpent Temple is a dangerous, poison-filled dungeon designed to challenge even experienced Metin2 players. Its narrow corridors, relentless waves of venomous mobs, and mechanics that punish slow reactions make it a true test of coordination. For players on the Europe and Eostre (EU West) servers, the Serpent Temple is a prime source of high-value accessories and enhancement materials, especially coveted during early server progression.
Entry Requirements:
- Level: 105+ recommended for survival and DPS consistency
- Key Item: Serpent Temple Key (crafted or obtained through high-level quests/events)
- Cooldown: 24 hours between runs
Rewards:
- Royal Sash (noble) — a high-end accessory with strong stat boosts
- Cor Draconis (Antique) — used for refining and crafting top-tier items
- Aura Fire Rune — important for enhancing aura gear
- Additional drops: poison resistance gear, upgrade scrolls, and rare materials
Dungeon Layout & Challenges:
- Tight hallways packed with poison-inflicting mobs
- Multiple mini-boss encounters that require burst damage to prevent add spawns
- Environmental hazards like poison clouds and trap triggers
Final Boss – Serpent Queen:
- Poison Wave Phase: Releases massive poison AoE that can quickly wipe unprepared players
- Summon Phase: Calls serpent adds that focus on the healer — must be dealt with immediately
- Enrage Mode: Increases attack speed and poison potency in the last 20% HP
Best Classes for the Run:
- Ninja (Dagger) — exceptional for quickly eliminating smaller mobs
- Sura (Weaponry) — strong single-target DPS for burning down the boss phases
- Warrior (Body) — soaks up incoming damage and controls enemy positioning
- Shaman (Dragon) — vital for poison resistance buffs and sustained healing
Tips for Success:
- Bring antidotes and equip poison resistance gear before entering
- Spread out during the Poison Wave phase to reduce group damage
- Assign a dedicated DPS to quickly clear summoned adds
- Keep healing cooldowns ready for the enrage phase
Estimated Run Time:
- 20–30 minutes for an experienced, well-prepared team
- 35+ minutes for groups still learning mechanics
How to Prepare for Dungeons
Essential Items
- Shaman buffs and elemental resistance consumables for added survivability
- Healing potions, antidotes, and resistance stones to handle damage and debuffs
- Teleportation scrolls and repair kits to save time and avoid mid-run issuesSufficient free inventory space for valuable loot drops
- Sufficient free inventory space for valuable loot drops
Optimal Party Setup
- Tank – Warrior or Sura to absorb incoming damage and protect the group
- Healer/Buff Support – Shaman to keep the team alive and boost stats
- DPS – Ninja, Sura, or PvM Warrior to maximize damage output
Pro Tip: On the new Europe and Eostre (EU West) servers, these dungeons are your fastest route to high rankings and powerful gear. Plan your raids in advance, coordinate with your team, and take advantage of event periods for maximum efficiency.
Want to accelerate your progress on the Europe and Eostre servers?
Get Metin2 Yang & Won at the best price on CoinLooting and secure everything you need for smooth, efficient gameplay — without the endless grind.